Baby shower

Today's post is a big CONGRATS to Monica on the arrival of her first child.  In honor of this, the Papertrey Pals decided to throw her a virtual shower.


For my card, I started with a kraft base then added the cute dino paper.  The "it's a boy" saying is from Doodlebug Designs purchased at Archivers.  The Double-ended banner is cut from Bazzill Cherry and tied with Rustic Cream Button Twine.  On the inside, I added these two cute guys from the paper.  The Congrats is from PTI Signature Greetings.


Thanks for stopping by ~
Rebecca

The Summer is over

As I sat down to write this post, I let out a big sigh.  I'm not sure if it's sadness that the summer is over or jubilation that it's over!  Either way, it flew by.  I will miss my not so little one but am looking forward to a normal schedule.  And maybe even some crafting!!

For the fist day back, I made teacher treats.  We have four this year so I am going to have to be budget conscious. 


I used my glassine bags for the first time.  I filled them with a honey bun and pack of instant Starbucks mocha coffee.  I made a simple wrapper from Stampin' Up scrap I had in my stash.  Next I printed the saying on card stock, cut it with my Tag Sale #1 die, added some extra decorations, and wrapped it all up with a bit of Rustic Jute Button Twine.  I hope the teachers all enjoyed.

Thanks for stopping by ~
Rebecca

Gifts

So the last few weeks have been gift making season around my craft room.  The first is a little something for a friends 50th surprise party.  I know the saying is 50 sucks but this women is vibrant, beautiful, and young at heart so I thought it was more appropriate.  Although she won't eat these, her grand kids are gonna love me!


The basket was purchased at the dollar tree along with a square piece of Styrofoam and the candy.  I used a small dowel to create the platform for the sign.  I hid it by punching a hole in the corner of the ring pop wrappers and sliding them down.  The rest is just cram until it's covered.


The next picture is a relay for life fund raiser basket.  I will apologize up front for these pictures.  It was very last minute that I decided to snap them.  I didn't even remember to take one with it all tied up looking pretty.


My concept was new home owner.  It has a paint tray, roller, painter tape, small tool kit, and Lowe's gift card.  I also made 20 change of address cards with envelopes.  For the "basket", I used a shoe box covered with paint chips.


These are really simple to make.  The houses are a Stampin' Up roller.  I added a splash of color and the tag.  All that's left to do is print address labels and stick them on.


I hope this brings in big money for my friends!
Thanks for stopping by ~ 
Rebecca

Reject Blog Hop

Oh, the sting of rejection...  Thankfully, Amber at Damask Love is taking some of the pain away by having a Papercraft Magazine rejection blog hop.  Submissions were for the Dec/Nov issue.  I entered the "So much to be Thankful for" category.


I made a hostess gift - thinking that the woman who braves everyone at Thanksgiving will need this when we leave!  This wine topper was super simple to make. 

I cut a 4x6 piece of craft and ran it through the cuttlebug with the PTI woodgrain impression plate that was inked in SU basic brown.  Next, I made the fold and cut a hole in the center to slip over the bottle neck.  The leaves were cut from PTI dies and Coordinations cardstock then ruffed up with sand paper.  I stamp the veining in Brilliance copper and gold to add the shimmer.  A label, sentiment, twine, and button finished it off.


So, I am going to make a confession.  It is hard to make blind submissions of my work.  There is no feedback and I'm never sure if I'm on trend.  Obviously, this wasn't what they were looking for but I was so happy when Papertrey Ink's release night came around.  On the stores home page this month what did I see...

Thanks for stopping by~
Rebecca

Sympathy Cards


Sympathy cards are never fun to make but they are cathartic for me.  I always think about the person that will be receiving it and try to create something peaceful and expressive.


This card has a tan base with cream front.   I used PTI Tea Dye Duo to antique the edges.  The cattails come from the stamp set With Sympathy and are stamped with SU certainly celery, sahara sand & basic brown.  The sentiment element is cut from Mat stack 2 die and stamped with the Mat Stack 2 Collection.  The ribbon, rhinestones and dragonfly punch are from Michael's.  


For the interior of this card, I cut a piece of cream with Mat Stack 5, edged it with the Tea Dye Duo, and stamped it with a sentiment from With Sympathy.  The image under the saying came from the Mat Stack 2 collection.  I think it was a nice finishing touch.


Thanks for stopping by~
Rebecca

Papertrey Pals April Challenge

Patterned Paper.  Who doesn't have a huge stash of it lying around?  I love it, buy it and then hoard it like it's gold!

Liz issued the challenge this month over at the Papertrey Pals.  We had to create something that incorporated at least 3 patterned papers.  It was difficult to make the first cuts on those pristine 12x12 sheets but once they were made I had a fun time.


This Birthday card is for the neighbor girl.  The polka dot and plaid papers are old.  I know I bought them at JoAnn's but don't have a clue as to what company they are from.  The pink flower was cut from the DCWV Stack 6.


The Lemon Tart background flower and numbers were embossed using Darice Embossing Essentials Polka Dot.  I really like the different size dots that are created.  I did not purchase this at the link above.  It came from a local store, Pat Catans.  


The butterfly ribbon is my favorite part.  It is also Darice and from Pat Catans.   I found it in the clearance bin last fall and have been patiently waiting for spring to arrive!


For color, I added some of the polka dot paper on the inside.  Then,  I detached to top and bottom of the ribbon on three of the butterflies and used them to break up the sentiments.  


Well, a need to give Liz a big Thank You for challenging me to use my paper.  
If you have a stash, dive in and play along.

Thanks for stopping by ~ 
Rebecca

Sophie's Birthday Party

Wow, what a few weeks it's been at our household!  We have been busy, busy then sick, sick... and finally I have found some quiet time to write this post :)  I warn you, it's a long one.


We had a BIG Birthday party for Sophie.  She turned 10 years old.  Where does the time go?  My baby in double digits??  It was a ton of fun.  We held the party in our church fellowship hall.  Family and friends came for lunch and then the celebration continued with the arrival of her classmates & Mr. G the Kid Comedian.


We had simple but bold decorations.  Bunches of balloons floated above top hats filled with peanuts.  Bowls of popcorn lined the white covered tables with streamers of crepe paper.  All these goodies came from a local concessions company, CJ Dannemiller.


Sophie loved her cake!  The designer did a great job.


For the treat bags, we made chocolate covered pretzels with sprinkles and white chocolate covered popcorn.  The toppers were made by cutting a printed Thank You with a spellbinder label die, folding it in half over the top and stapling closed.  Easy Peasy!


The chocolate covered popcorn is always a hit and so simple to make.  I buy pre-made popcorn, melt white Wilton candy melts, dump on top and toss to coat.  I've used colors before but I don't think it looks as nice.  I have also used microwave popcorn.  Usually the ratio is 3-4 bags to 1lb of chocolate but  I prefer to buy a big bag from Dannemiller's for the consistancy.  It can be a pain picking out unpopped kernals before coating.  And for some crazy reason, I tend to burn micro popcorn - lol
Usually, I don't hire entertainment for Birthday parties but I am so glad that I did this year.   Mr. G was a huge hit!  

I went to high school with Greg and participated in numerous drama productions with him.  He has always been a talented actor not to mention a fun, intelligent, and caring individual.  He did a fantastic performance that had everyone laughing and involved.  

As the kids arrived, he led them in a great game of Simon Says and then rolled right into the show.


He included the kids & the adults.  (The good sport "grown up" is my brother!)


Most importantly, he made the Birthday Girl a very active participant.  She really enjoyed herself.


(Notice the three yr. old in the front that kept pointing and telling him he was doing it wrong.  She was so cute!)  Here they had a balloon blowing contest.  Obviously,  Mr. G's won with the help of his air pump.


For me, hosting a party that has adults as well as kids of all ages is difficult.  Finding activities that keep everyone engaged is almost impossible.  Mr. G was the answer.  He did a wonderful job bridging the age gap.


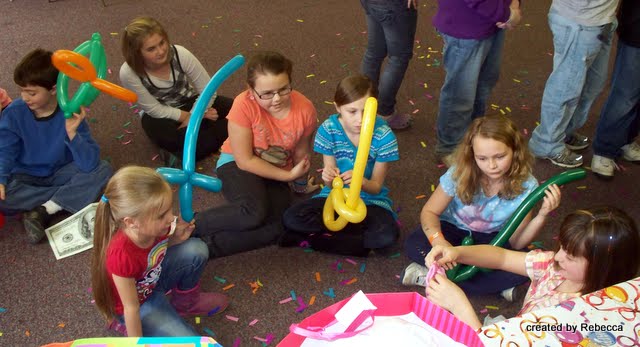
After the show,  Sophie opened her presents while Mr. G made the kids balloon figures.  Most of them picked swords or wands which they later took outside and used to battle each other.  I guess that is one way to run off all that cake!


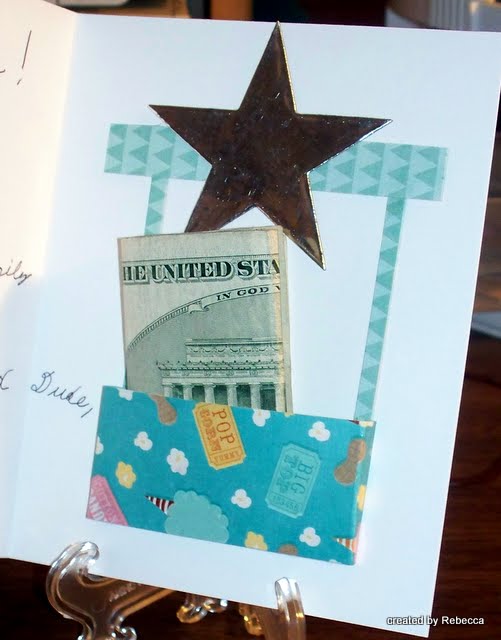
At the end of the day,  Sophie had a special card she had made for Mr. G.  She used  PTI Double Ended Banner die, Limitless Layer 2 1/2" circle die, Seeing Stars Collection & Signature Greetings stamp set.  The polk a dot paper and photo corner punch are Stampin up.  The inside concession stand was made from scraps of Imaginisce Animal Cracker paper line.  The star was cut from Art Emboss pewter embossing metal.
I think she did a fabulous job!


One last thing I want to share with you is Sophie's special hair tinsel.  Although her present was the party, I did have to do a little something fun and girly with her!  A big Thanks goes to Becky Wiese at Mira Hair & Body Studio.  She just loves it!  It is inexpensive, temporary (4 weeks), and FUN!

  I hope you found some fun ideas for your next party!
Thanks for stopping by~
Rebecca

Papertrey Pals Easter Challenge

Today is the reveal of our Easter projects over at the Papertrey Pals blog and I can't wait to see what everyone made!  For my project, I chose to decorate boxes of candy for each of the kids and wrap up a coordinating gift.


The gift is yellow tissue paper covered with white tissue paper and then bound with a strip of Lemon Tart paper and raffia.  I used PTI Mat Stack 4 to cut the label.  
CAS but still cute.


The boxes came from the dollar tree.  12 for a buck!  You can't beat that.  I used a different tool to add the background colors.  It is a Clear Snap Colorbox RolTap.  My stampin' buddy and Aunt turned me on to this a few years ago.  She found them at a convention but I posted an online link above.
 

The ends of the tool are dense foam rollers.  You tap it on the ink pad and then roll away.  For the girls, I chose pink, yellow, & orange for the main colors and layered in no particular direction.  I added a bit a blue, purple or green where needed.  I was going for a soft plaid.


The circle shapes are cut from PTI Limitless Layer Dies 1 & 2.  I couldn't decide between the big or small so I used them both!  The bunny images are from last year - Stampendous Luv Bunnies. 


For the one boy box, I tried to make the plaid more pronounced.  The colors are darker blue, yellow & orange.  I cut off the existing handles and added a paper one.


Hope you are inspired to get ready for Easter.
Thanks for stopping by ~
Rebecca

 It's late in the day, but I just watched the Make it Monday video and had to come back and edit this post.  It's like Betsy and I are cosmically connected!  HaHa!  I haven't used my Roltap in ages.  I just might make something else with it this week :)
Related Posts Plugin for WordPress, Blogger...